To my utter delight, my sister had her first child (my first niece!) on Christmas Eve of this year. In addition, my best friend also had her first child back in October. Thus, one of the the major themes to my DIYing for 2012? Crafting for crib midgets. All kidding aside, I’m super excited to be able to make things for these two sweet little ones in my life. Therefore, two of the first things on my list were 1) finding a sewing book with lots of great baby patterns and 2) searching Ravelry for cute baby knits and queueing them up. After a quick trip to Barnes & Noble, I had checked the first thing off of my list. This is the book I chose:
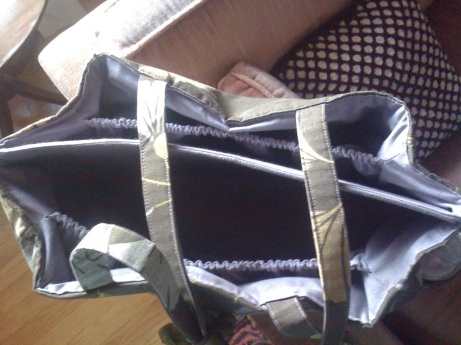
This book is chock full of adorable baby things, from clothing to diaper bags to crib accessories. I usually steer clear of pattern books because I find I’m usually only buying the book for a few patterns. But in this case, I thought 2/3 of the patterns looked adorable. Book acquired! I immediately went to work. First order of business was making my sister something for her baby shower. I decided to make her “Everything Bag”, with the addition of the “Changing Pad” from the “Modern Diaper Bag” pattern. For the bag, I chose a lovely Waverly brown, purple and chartreuse ginkgo print home dec weight fabric for the exterior and a coordinating solid lavender home dec weight for the lining. Bothbof these were purchased at Jo-Ann’s. The bag also requires fusible interfacing, fusible fleece, and fusible stiffner/stabilizer. I thought that the pattern instructions were actually fairly easy to follow (despite the lack of diagrams and pictures Amy’s patterns are known for). And, the bag went together fairly quickly after all the pieces were cut and interfacings/fleece fused. The only problem I had was trying to topstitch the lining to the exterior because ultra-stiff (that’s what she said) inside divider meant that it was nearly impossible to get beneath my presser foot. Also, at that point I was sewing through so many layers of fabric that I thought my trusty Kenmore might die on me. After many rounds, several expletives, a few glasses of wine, and some surreptitious hand-stitching, I was triumphant.
So triumphant in fact, that I decided to make another one of these bags for my BFF. (Why mess with a good thing?) Her bag is made in a Premier Print blue/brown elephant fabric for the exterior and a solid brown quilting weight fabric for the lining. Modifications: I thought that using the quilting weight for the lining would help with reducing the bulk for the topstitching. Who loves you lil’ Kenmore? But, in retrospect, I think you need the two home dec weight fabrics to withstand all the pushing/pulling that must happen for you to get the bag under the presser foot to topstitch. Secondly, I decreased the height of the divider by about 1 inch, which helped me be able to topstitch the whole bag this time by machine. All in all, though, I think her’s turned out ok, too.
After getting the bags done, I needed to make the changing pad for my sister’s bag. It is really a simple pattern. I used the same ginkgo fabric for the exterior and chose a light green terry cloth for the interior fabric. There are two layers of organic cotton batting sandwiched between them. I’ve never quilted anything before. What I learned? I need to explore a walking presser foot. It’s dang hard to keep all those layers lined up with a normal presser foot. But, I think it’ll do the trick for changing my lil’ niece.
Next, since I had some leftover fabric, I thought I’d give the Elfin shoes from the book a go. So, I crafted two pairs of these adorable little shoes. When cutting out the fabric, I couldn’t see how exactly the fabric came together to make the shoe, but the instructions were clear and I had smooth sailing until trying to figure out how to add the second sole. I thought that the instructions could have been a little clearer (or could have had a picture) on where exactly you were supposed to sew. The first time I did it, the seam of the second sole (on the inside) was visible and the fabric did not lay flat against the exterior sole. I had to take it out and retry a couple of times before I figured it out. But, ta-dah! Cute, eh?


